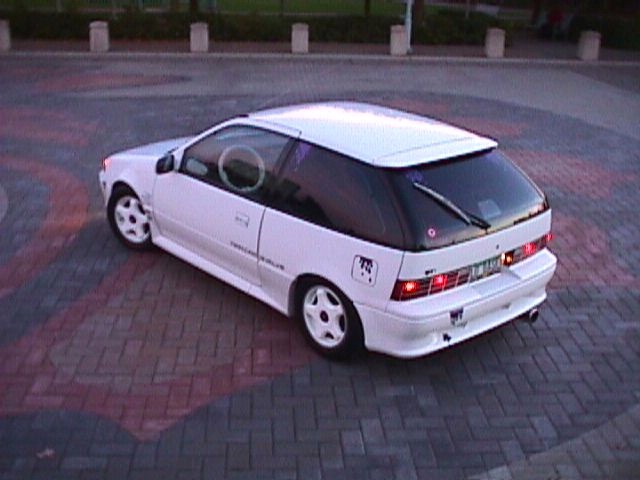
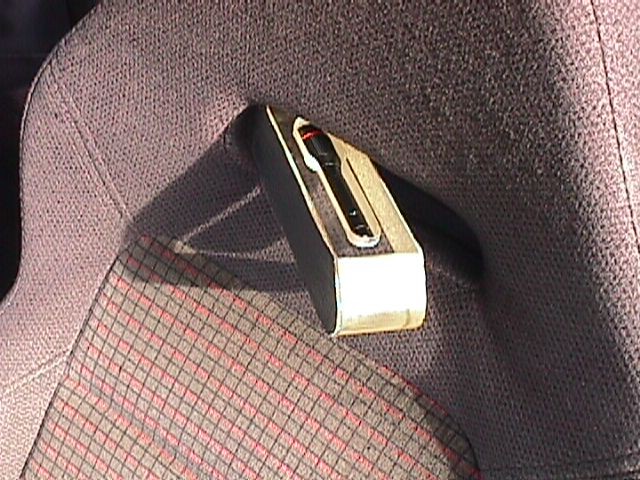
Have to start somewhere so I might as well start with the outside!
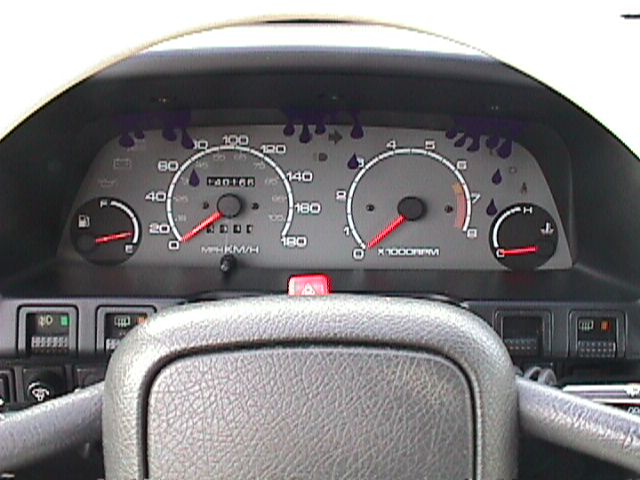
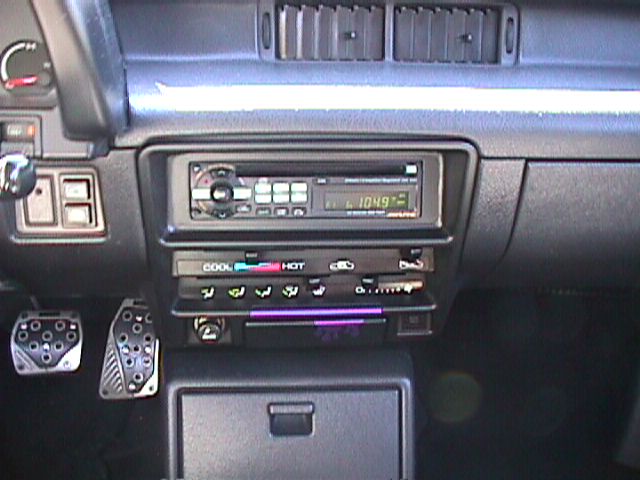
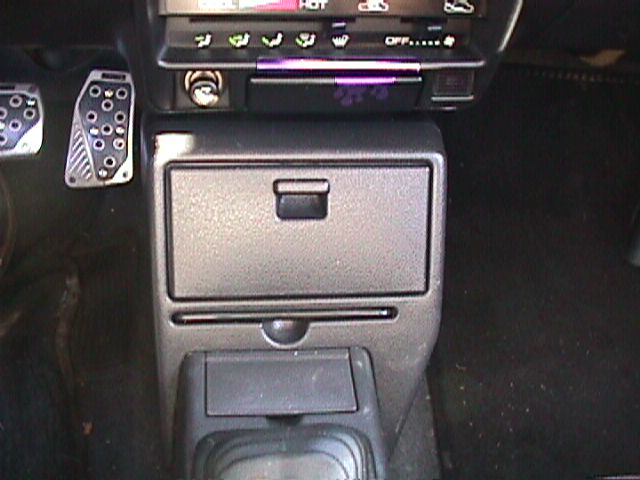
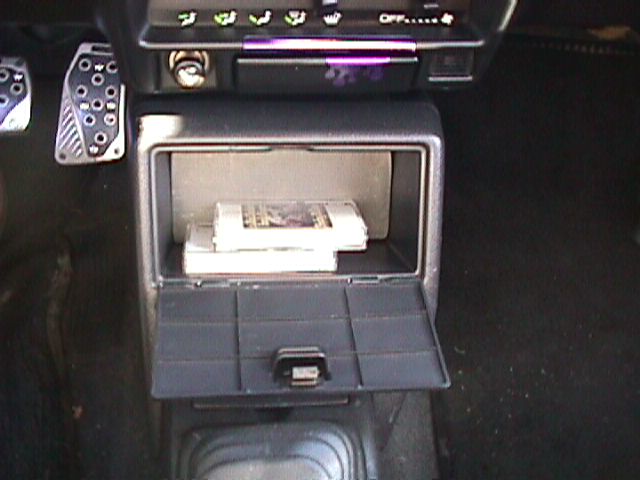
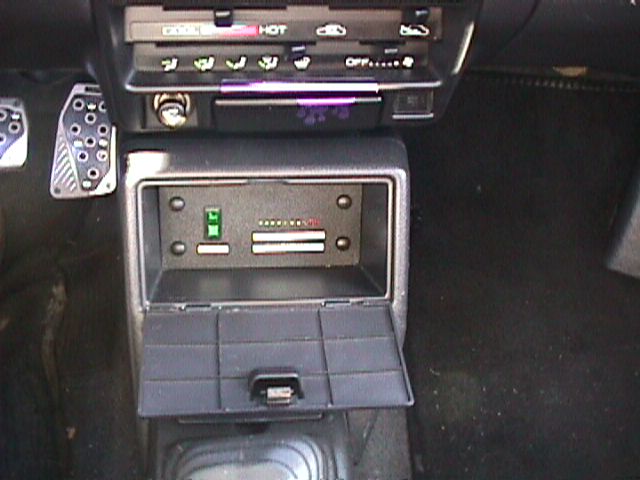
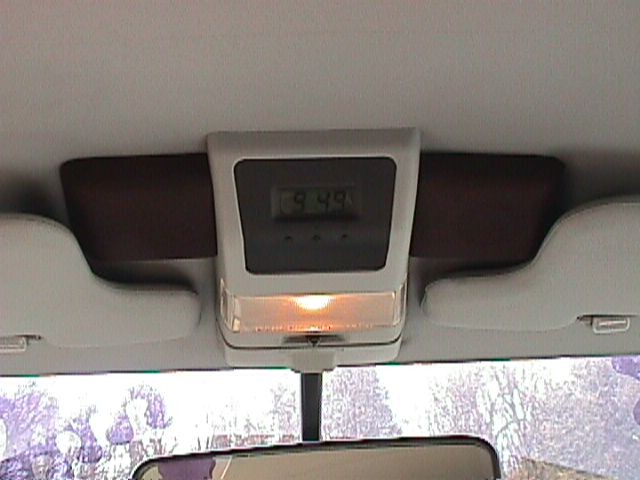
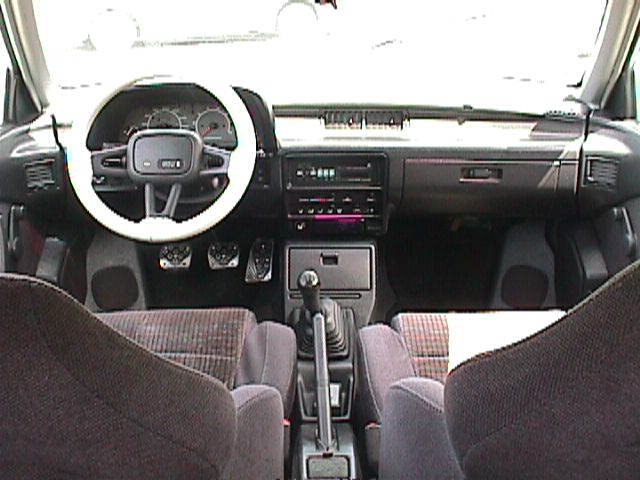
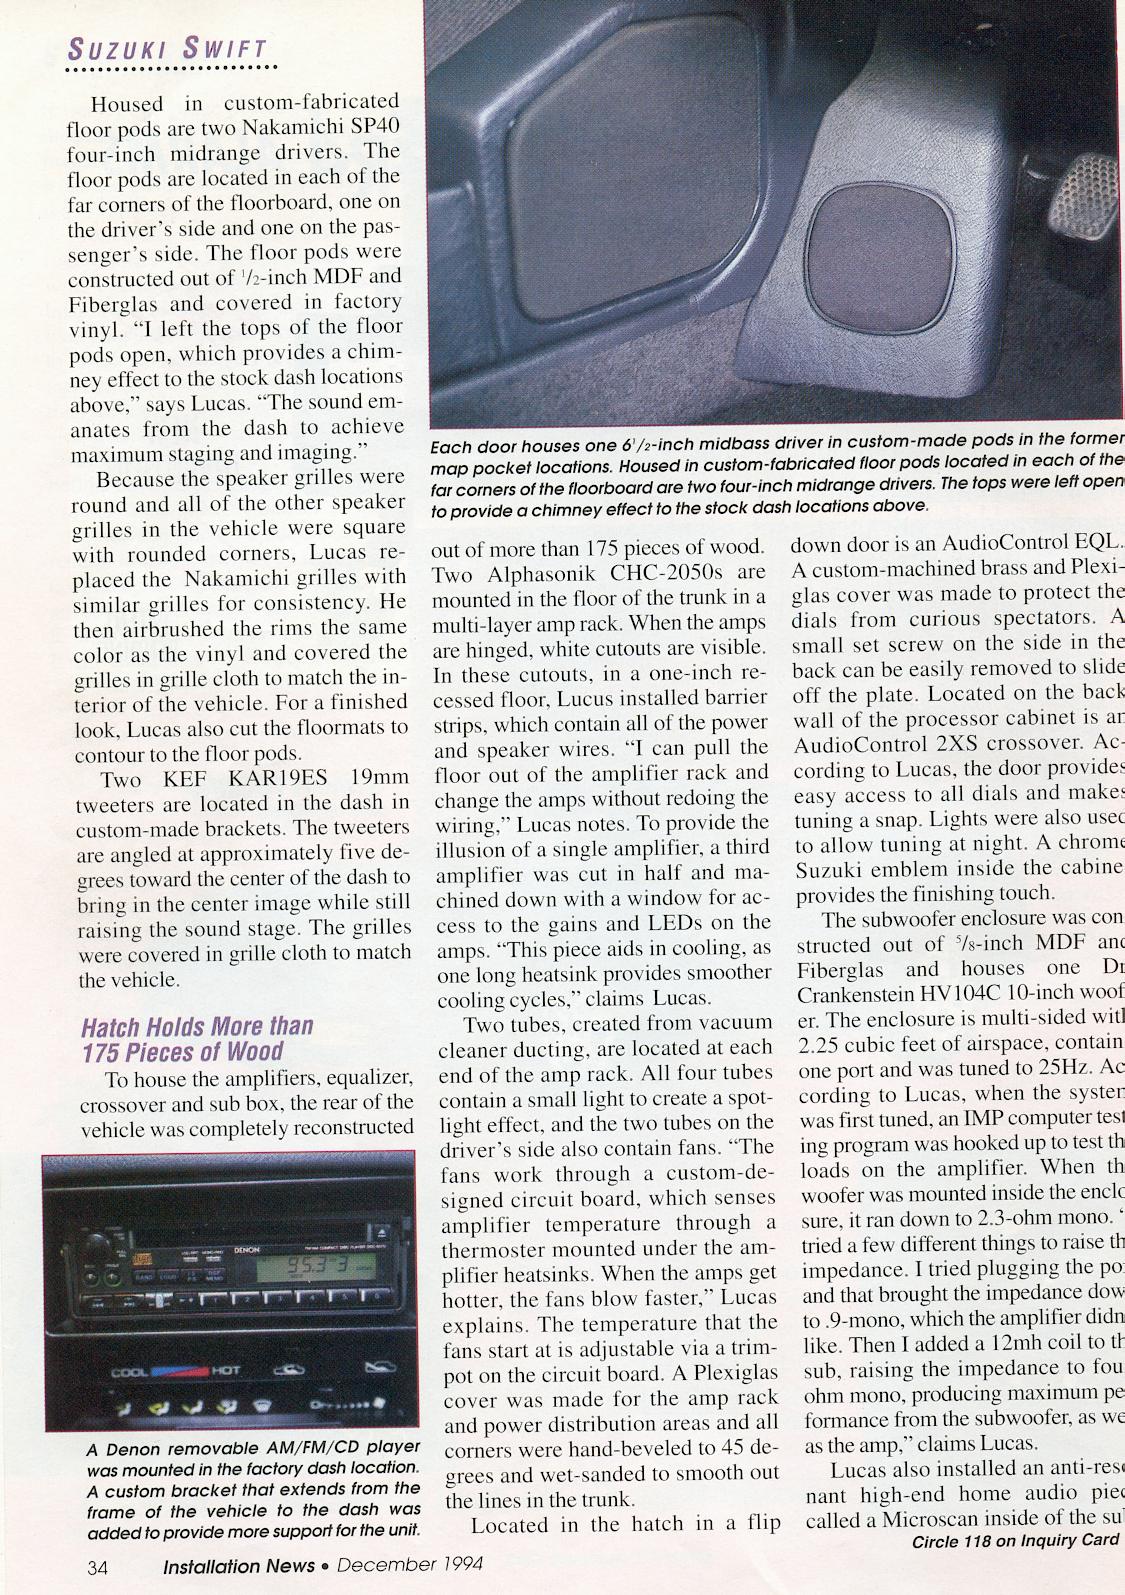
The ride height was lowered 3 3/4" by relocating the strut tower plates and custom compressing the struts. American racing Type 29 rims wrapped in BF Goodrich Comp T/A tires improve handling. Frost white paint with a custom purple drip theme, tinted windows, custom rear tail lights and a mono wiper finish up the exterior mods 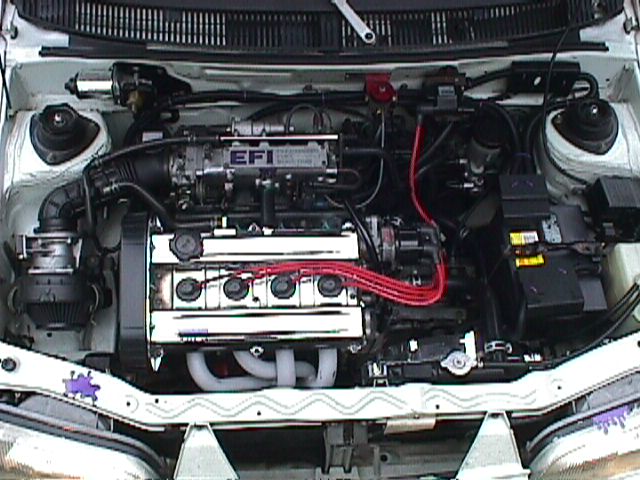 The stock 1300CC Twin Cam engine is ok at 100hp but not good enough here :) The block was bored to accomodate 75mm pistons and shaved to increase compression. The head was ported, polished and also shaved. Bosche Platinum plugs and Aurora 8.5mm wires give it some spark. A K&N filter with a custom Ram Air setup mated to a bored MAF provides the air while a NOS fuel pressure regulator ups the fuel pressure. The cam gears are custom adjustable. Exhaust exits via a Calmini 4-2 header, high flow cat and 2" pipe going to a Flowmaster muffler. Charging is handled by a upgraded alternator and a energizer battery. The transmission has completely been reworked and is matched to a Centerforce 2 clutch Just to finish it all off a little bit of chrome and purple :) Two factory switches were added to the dash either side of the steering column. One is a system valet switch and the other controls the fans to cool the amplifiers. The factory bezel for around the radio and heater controls was extensively modified to flush mount the Alpine CD player. Oh and more purple drips! When the optional center console door is opened a decoy cover is seen. A close look reveals what looks like two cassettes.......Andy Gibb - Shadow Dancing and Rex Humbert and the Family Singers - Feeling at Home.... this should deter most thieves! When the decoy cover is removed a switch for the lights in the hatch area and an amplifier temerature display are visible. The temperature display is in fact a custom designed and built circuit board that works with a thermoster on the subwoofer amp. When the amps get hotter more lights iluminate. When the temperature gets to a pre-determined level they flash to warn the operator. The optional overhead clock console was also modified. Two custom machined medite and aluminum tweeter pods were made and mounted to the console and covered in grill cloth to blend. The glove compartment was also modified with a false floor that houses spare fuses and a digital test meter. A cover is put in place when not in use. This picture shows the custom kick panels, the leather wrap installed on the steering wheel, later model instrument cluster and shift knob, the "grater" pedals and the custom fuse holder in the center consol. Not shown in this picture is the tool and first aid kit bin under the drivers seat. Both front seats have a factory knockout for appearance. Hmmm what can I put there? How about blocks of 1 1/2" thick plexiglas custom machined to fill this space. These blocks are then machined to hide a maglite in the drivers seat and spare crossover chips in the passenger seat. These blocks took HOURS of wetsanding to get show ready. The front and back faces were then covered in factory ordered vinyl to blend into the seats and now look like part of the seat! 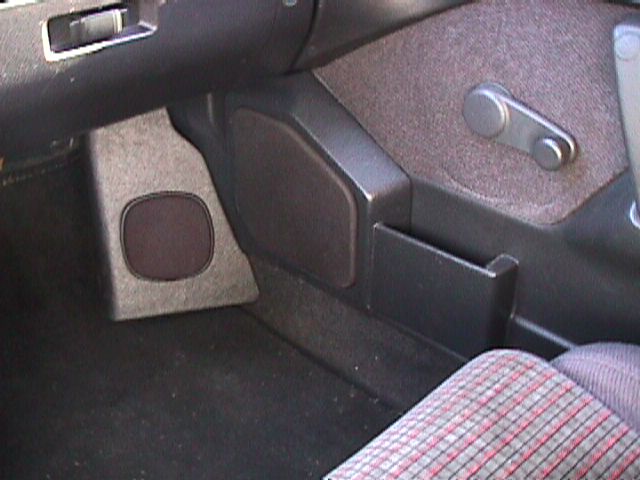 Now for the front stage...In order to bring midbass to the front of the car door panels needed to be created. The stock map pockets were removed from the doors and pods were fabricated from medite and fibreglas. New shorter pockets were then made and integrated into the pods.the pods and pockets are cover in Suzuki Vinyl and all seams are filled and airbrushed to match perfectly! Tucked neatly in these pods are MB Quart 6 1/2" mid bass drivers.
For the vocal end of the soundstage Nakamichi 4" drivers are located in custom pods in the kick panels. These again are covered in factory vinyl. These floor pods fool the ear in believing that the listener is actually in the center of the car whether in the drivers or passenger seat! Lots of hours with templates have payed off! The grills from another brand of speaker were used to match the shape of all the other grills in the car and airbrushed to match and covered in grill cloth.
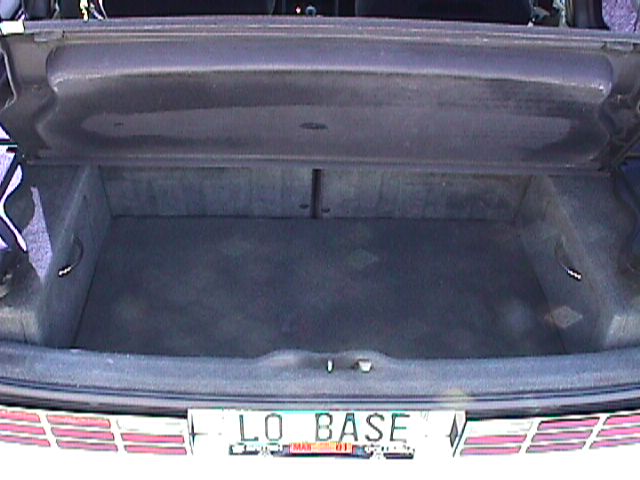
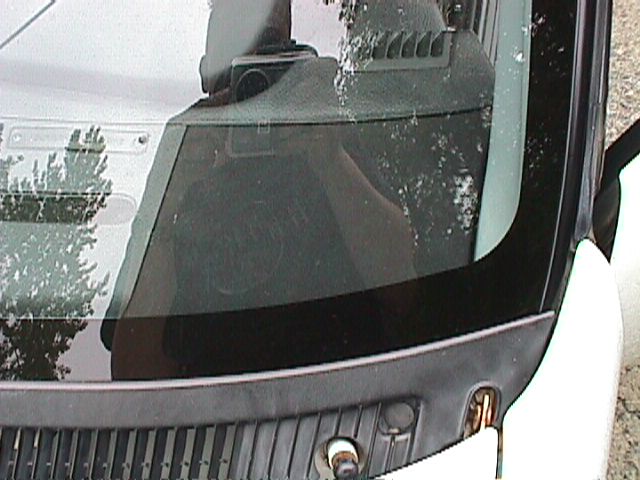 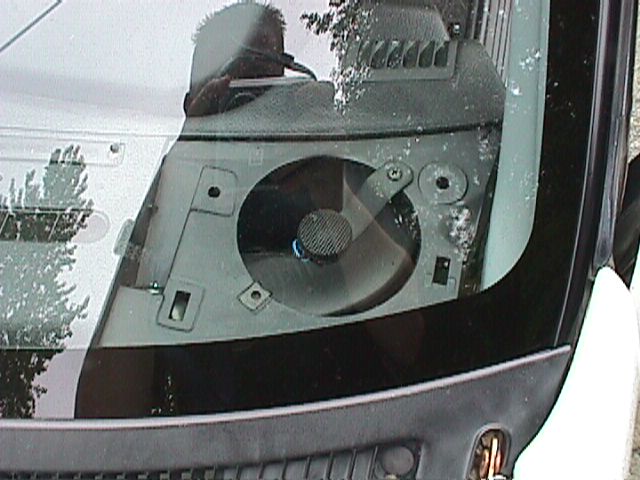 The stock grills on the dash have been covered in grill cloth to match all the other grills in the car. Custom brackets mount KEF tweeters that help raise the soundstage. It is amazing that even though most of the speakers are at the floor level the sound appears to be 12" over the dash! All those hours are paying off again! Now to the main area of the system. Even though my GTi is a small car, a high priority in the system design was maintaining useable trunkspace. As seen in this picture this mission was met! In fact a mere 4" of the trunk floor is taken and the rear corners of the hatch. All iterior panels and the back of the rear seats were reupholstered to match the system. When the new trunk mat is installed as shown in this picture it looks almost stock! 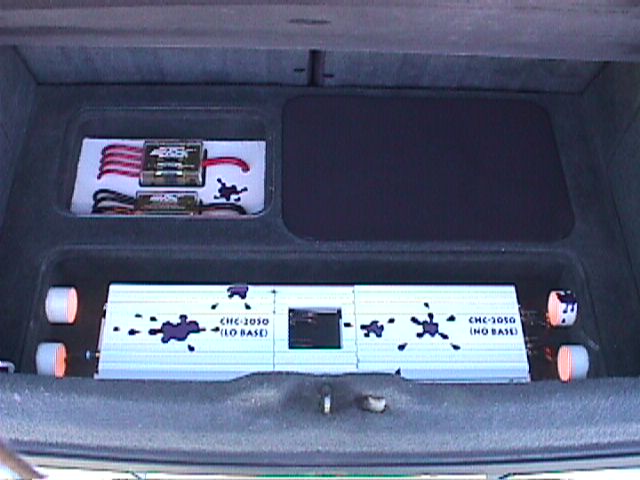 When the floor mat is removed the hours begin to show. At the far left of the trunk you see the power and ground distribution compartment. This area has lights for night time troubleshooting. Special attention was given to ensure no writing on any wire is visible to the eye.
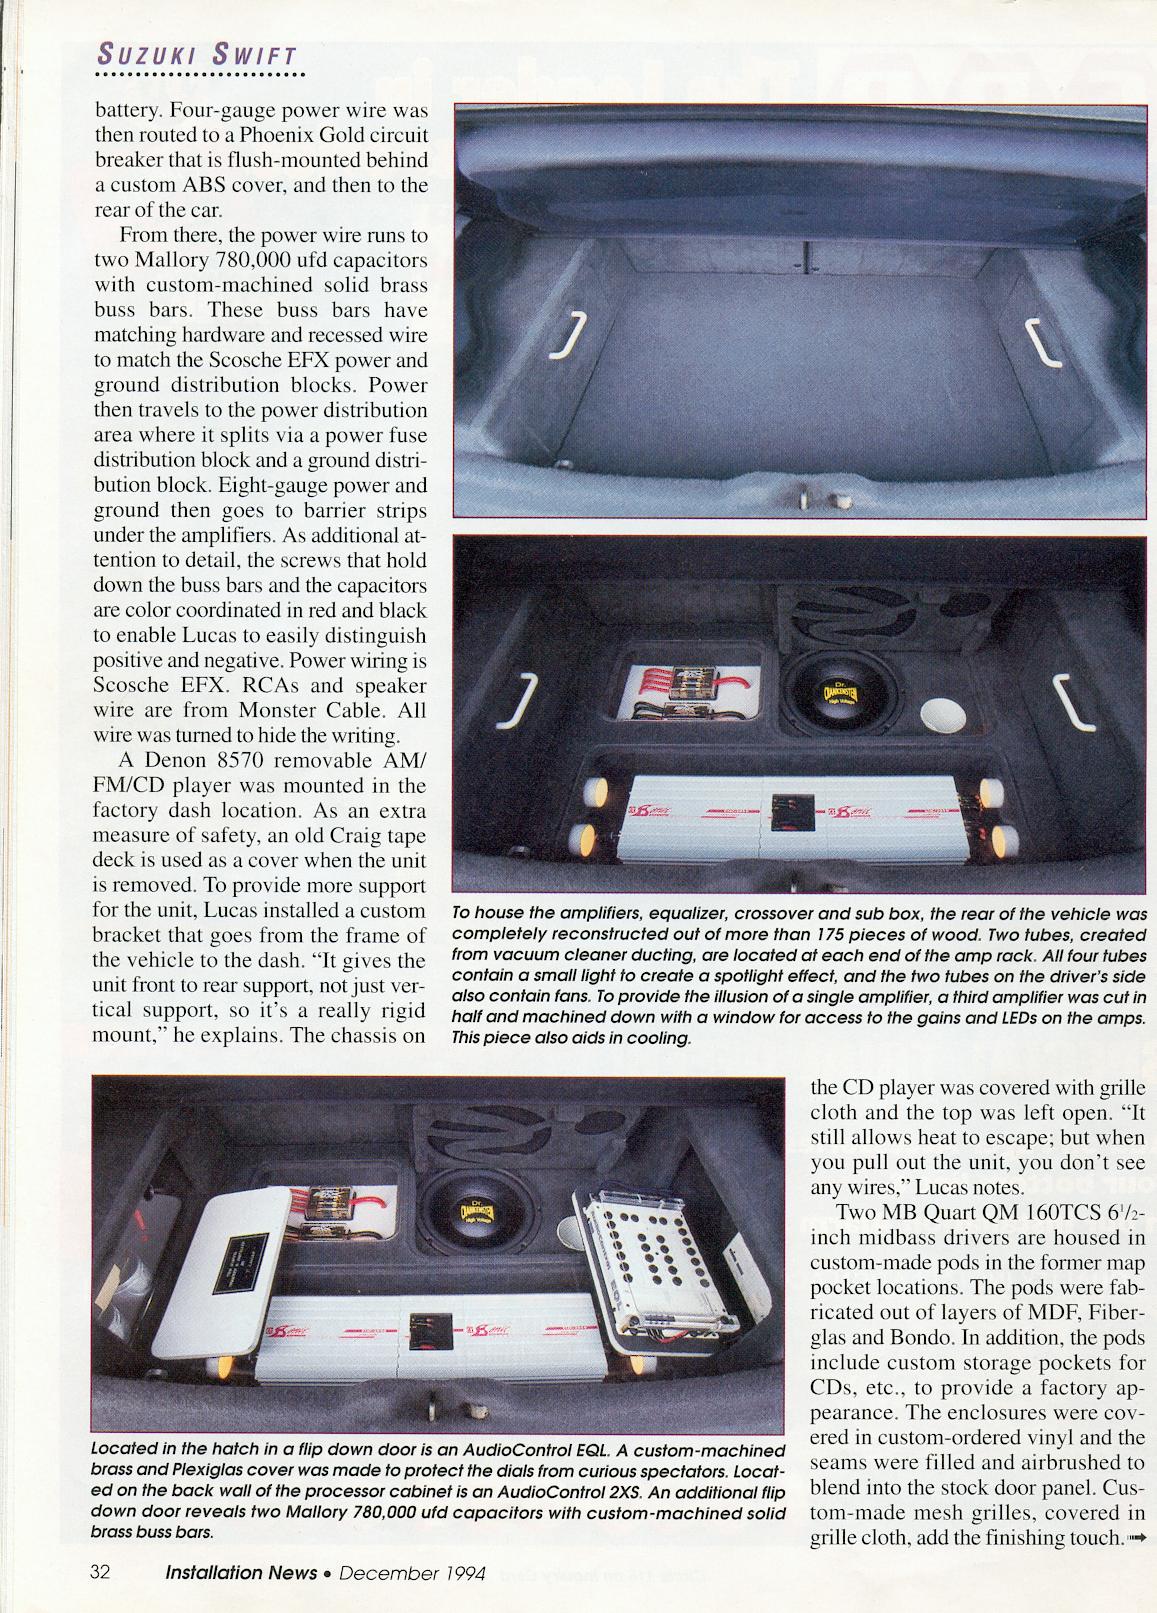
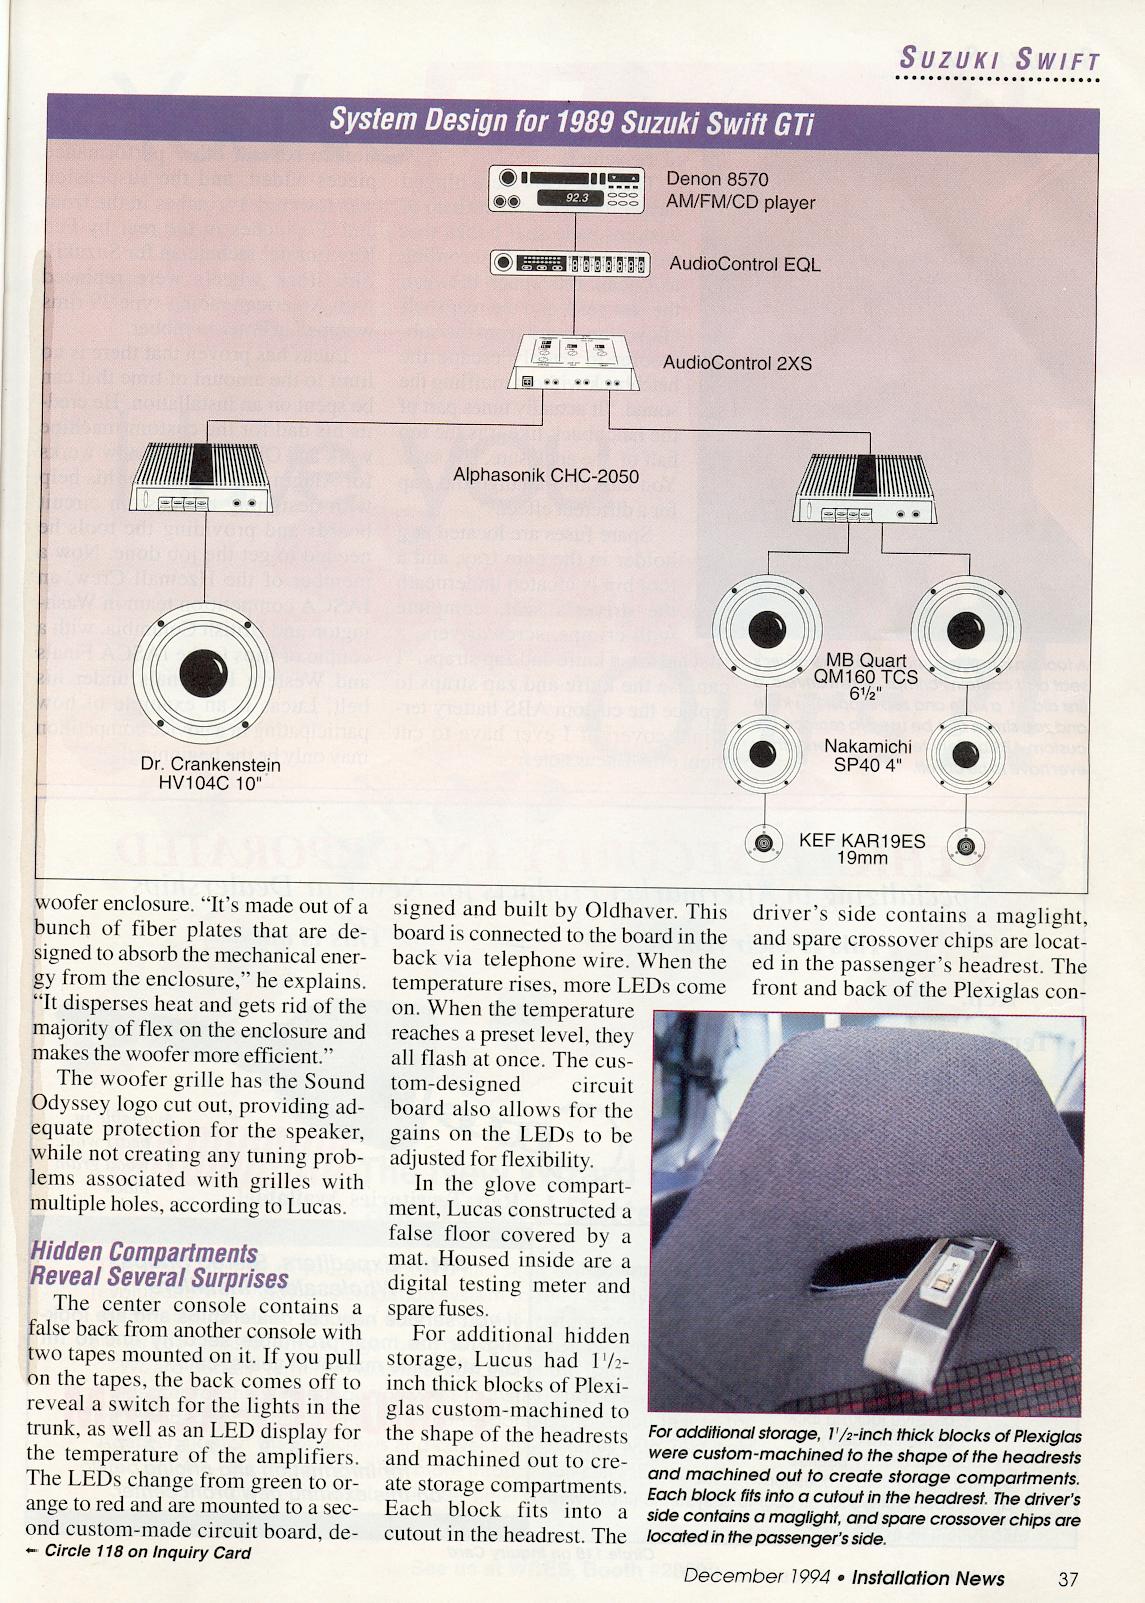
Directly in front of the distribution area is the amplifier bin. The amplifiers of choice are competition series high current amplifiers made by Z Audio. These amps produce 2x50 watts at 4 ohms stereo. The amp for the sub is running at 4 ohms mono and the amp for the mid bass, mids and tweeters is running at 2 ohms stereo. For a total loaded power of 400 watts. you may say....there is only 1 amp! Sorry, in fact a third amp was butchered and custom machined to fill the space between the 2 amps! The window allows access to the gains etc. This custom heatsink provides more surface area for better ampilfier cooling and better air flow from the fans. The light tubes are in fact PVC ducting that draws cool air from the drivers rear fender and expells warm air to the passenger rear fender! Inside these ducts are lights and computer fans. The fans are hooked up to a custom designed and built circuit board that senses amplifier temperature and adjust fan speed relative to temperature! The amps were painted white to match and have the drip theme applied. The sub amp is labeled "LoBase" and the vocals amp is labeled "NoBase" :) To show the level of detail....all screws have been filed so the philips screw heads line up the same way!!! Both the power and amp bins are covered in plexiglas that has been hand beveled to 45^ and hand polished clear. 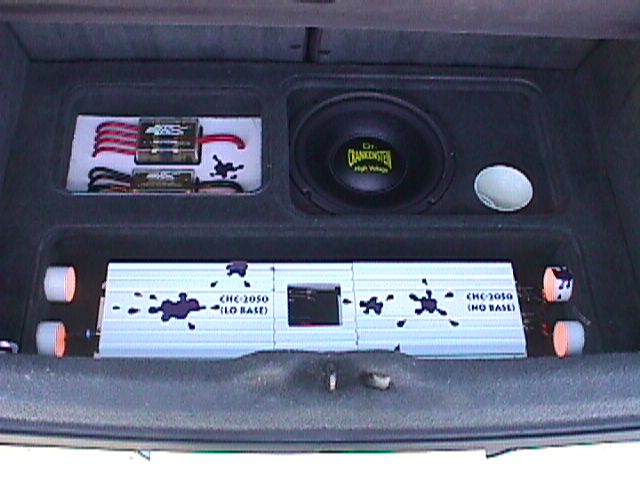 When the custom grill for the subwoofer is removed you see the Dr Crankenstein duel voice coil competition series 10" sub. The grill itself has a S logo cut into it instead of drilling large holes. This provides excellent speaker protection but eliminates tuning problems associated with holes. The enclosure is a ported one made of medite and fibreglas that fills the spare tire well. Using computer design software this enclosure is tuned to 25hz! To eliminate any unwanted resonances in the enclosure a high end home adio piece by MicroScan was installed. It is a series of fibre plates that absorb mechanical energy from the enclosure and transfer it to heat energy. this enclosure was actually too efficient! When first ran the sub amp was loading down to 2.3 ohm mono and when the box was sealed, ran down to 0.9 ohms mono (all measured on an IMP computer using square waves) Needless to say the amps did not like this! A 12mH coil was added and the amp now runs at exactly 4 ohms mono.
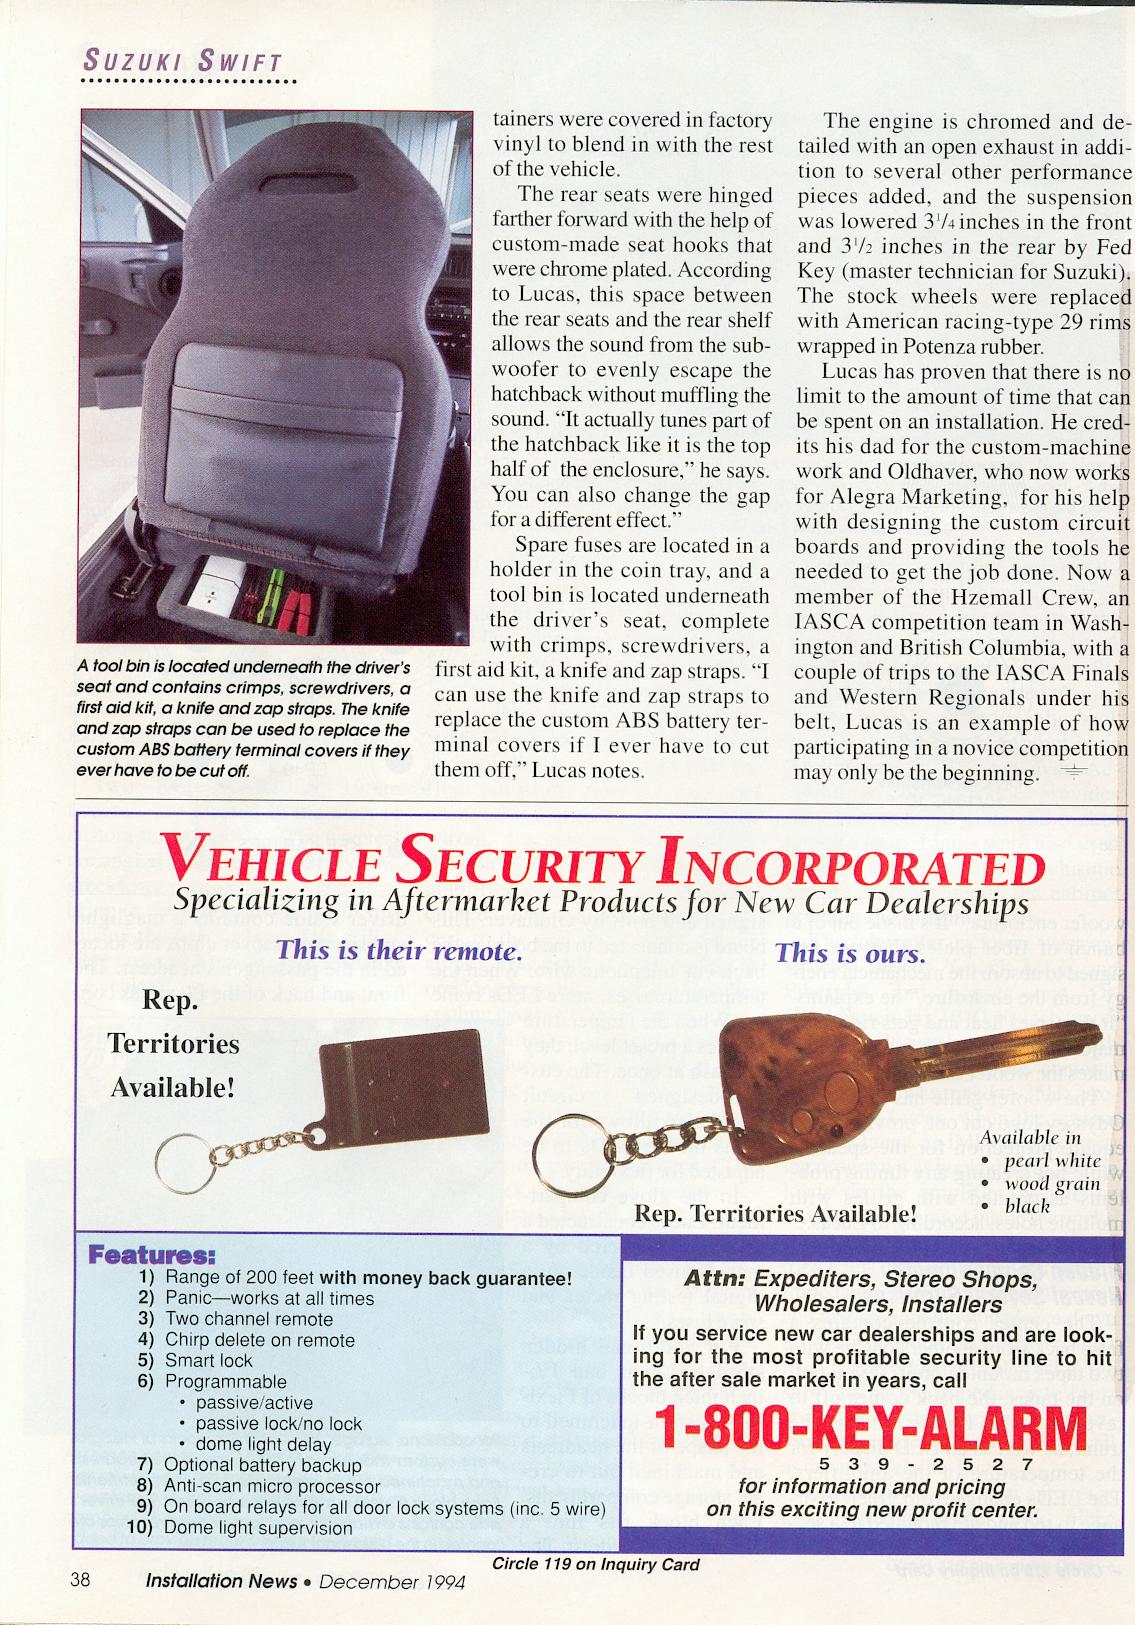
Custom rear seat hooks were made and then chrome plated. These longer hookers make the rear seats fit more vertical. This creates a space between the back seat and hatch tray allowing sound to leave the hatch area without being muffled. 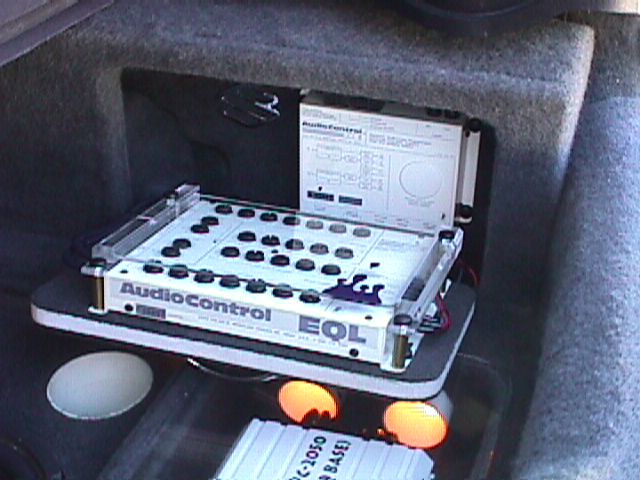 The compartment on the passenger side houses all the processing equipment. This includes an Audio Control 2XS crossover and an Audio Control EQL equalizer. Lights iluminate this compartment for night time tuning. A custom machined brass and plexiglas sliding cover was made to cover the equalizer to eliminate the chance of the settings being changed accidentally. A chrome Suzuki logo was installed inside the compartment for added detail. Again details...details........details, all interconnect cables side by side read Monster on one and Cable on the other! 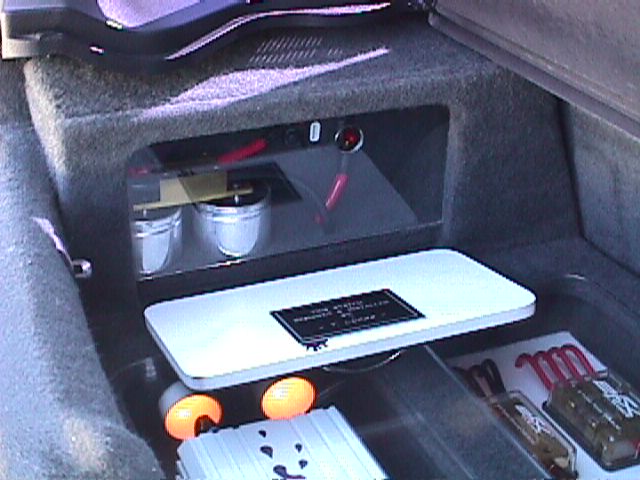 4 guage power wire runs from the front of the car to the rear drivers side compartment. Inside this compartment you will find 2 750,000mfd chrome stiffening capacitors with custom machined brass buss bars. These bars were made to match the power and ground distribution blocks exactly. Power wire is countersunk the same way and all hardware is the same. For addition system and vehicle safety a circuit breaker was installed inside this compartment also. A hole was added (which took hours of wetsanding!!!) to access the reset switch.   The car did pretty well on the show circuit......Notice they are 3 deep! The car came out of 6 years of retirement in the summer of 2000 for 2 shows only to kick some ass and take home 2 more 1st place finishes! Here is a list of results....
1990 (The rookie year)
1st - 1
2nd - 2
a couple of 4ths and 5ths but no trophies :(
1991 (cleaned up the rookie system)
1st - 6
2nd - 1
3rd - 2
4th - 2
best of show - 1
IASCA Zone 14 points champion
7th place IASCA world finals Oklahoma City, Oklahoma
1993 (New system)
1st - 12
2nd - 1
3rd - 1 (Iasca Western regionals)
5th - 1 (yeah.....i know!)
Best of Show - 1
10th IASCA world finals Tulsa, Oklahoma
1994 (Same old system)
1st - 3
2nd - 3
3rd - 3
5th - 1
6th IASCA Western Regionals
Time to retire :(
2000 (Same system but with a face lift!)
1st - 2 (only competed in 2 shows!)
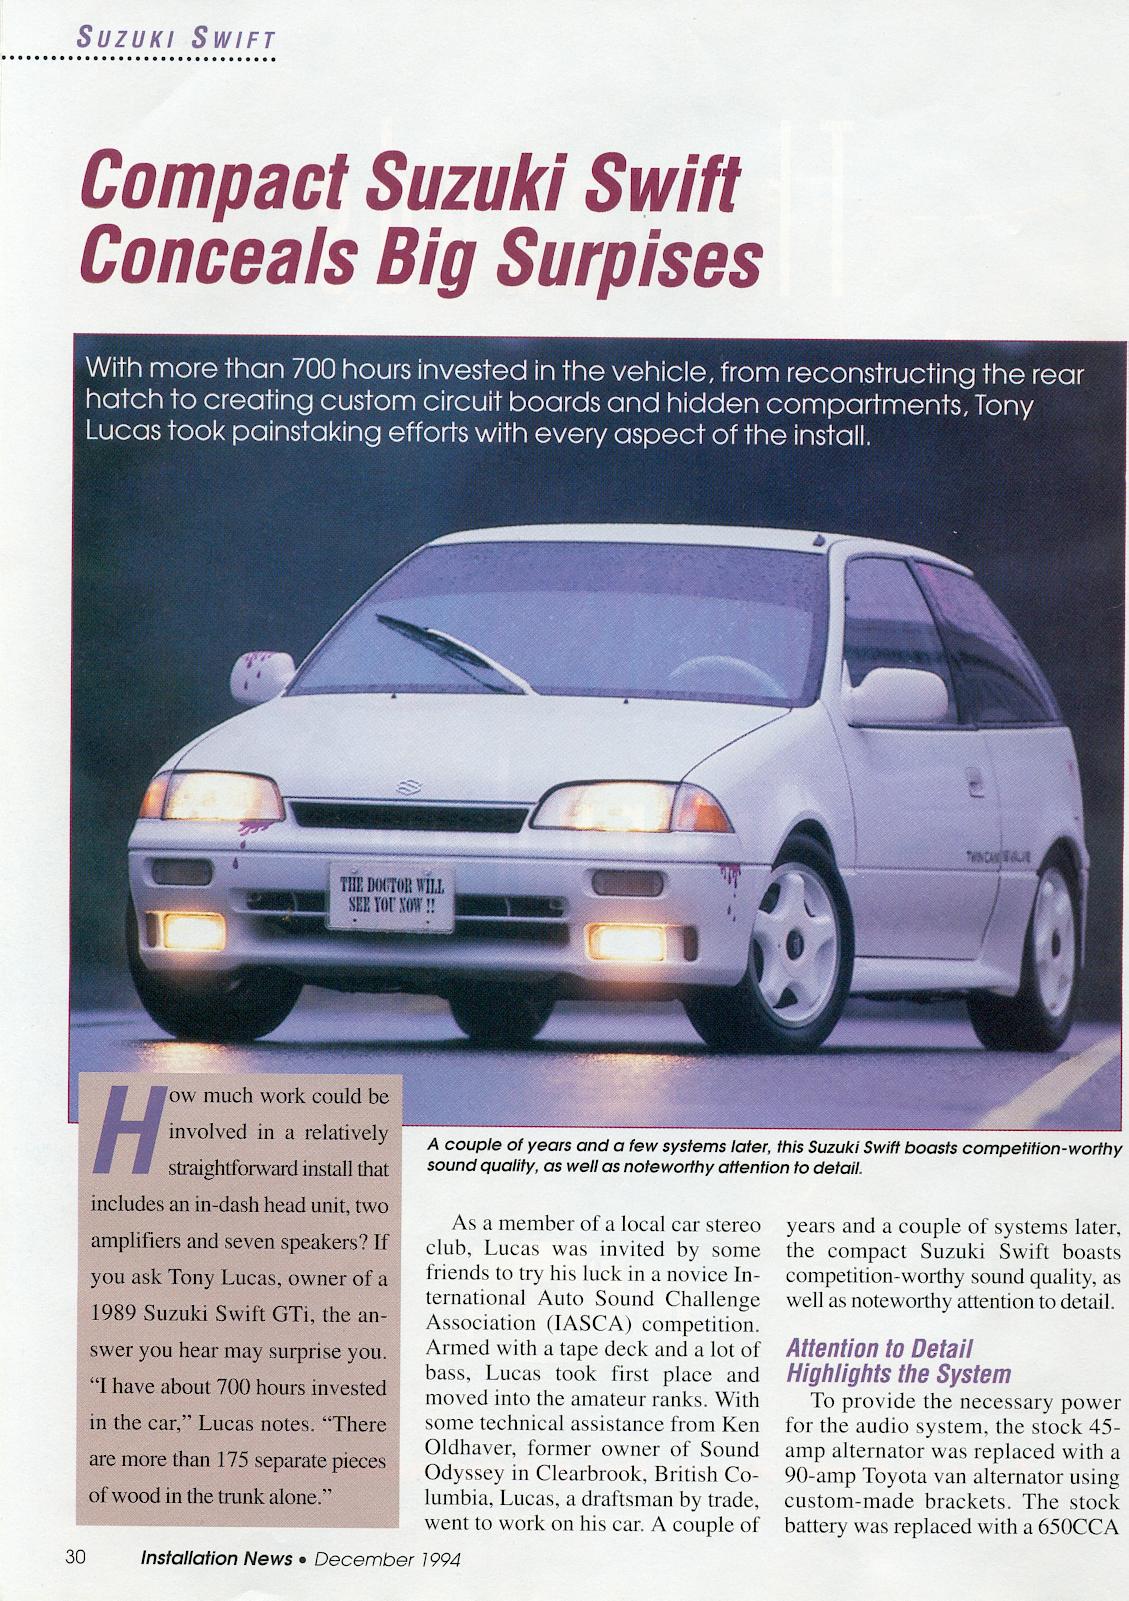
The car was also featured in a national magazine called "Installation News" with a 4 1/2 page article in december 1994. pics will be scanned shortly!
|